其实我是更喜欢Debian的,尤其是刚发布不久的Debian9,毕竟和CentOS相比,Debian9官方源的包多且新,满足了我对Linux系统的所有需求。
但是由于工作原因,用得更多的是CentOS,其中我新接手的项目用的都是CentOS7,毕竟CentOS6相对来说有些过时,很多包版本都过低,尤其是我的主力开发语言,还是5.3.x。而且CentOS7是未来,包含了很多新特性,用新不用旧嘛,所以我更多的是选择CentOS7。
首先是更新整个系统:
yum update -y
虽然不是必需,但我还是推荐安装EPEL源,能弥补系统官方源的很多未包含的包:
yum install epel-release -y
安装Nginx
接着是安装Nginx,虽然安装EPEL之后,源里就自带了Nginx,但是,出于各个平台的统一以及版本的考虑,我更倾向安装Nginx官方源里的,新建一个repo文件,然后把下列内容黏贴进去:
vim /etc/yum.repos.d/nginx.repo
[nginx]
name=nginx repo
baseurl=http://nginx.org/packages/centos/7/$basearch/
gpgcheck=0
enabled=1
这样就相当于添加了Nginx的官方源。官方相关页面在这里。
安装Nginx:
yum install nginx -y
添加webtatic源及安装PHP 5.6
接下来是安装PHP。
由于CentOS7官方源自带的PHP版本太低,很多情况下不能符合我们对PHP版本的需求,所以,我选择第三方源的PHP,可以自由选择PHP的版本进行安装,同样,添加源:
rpm -Uvh https://mirror.webtatic.com/yum/el7/webtatic-release.rpm
如果提示如下:
[root@doams3 ~]# rpm -Uvh https://mirror.webtatic.com/yum/el7/webtatic-release.rpm
Retrieving https://mirror.webtatic.com/yum/el7/webtatic-release.rpm
warning: /var/tmp/rpm-tmp.eB1NCs: Header V4 RSA/SHA1 Signature, key ID 62e74ca5: NOKEY
error: Failed dependencies:
        epel-release >= 7 is needed by webtatic-release-7-3.noarch
则需要先添加EPEL源:
yum install epel-release -y
再次执行添加webtatic源命令就好了。
执行之后,就添加了webtatic源。
接下来是选择需要安装的PHP版本。
由于webtatic源支持很多个版本,具体可以通过搜索包名的方式查看,比如说我想查询PHP 5.6的情况:
[root@doams3 ~]# yum search php56w
Loaded plugins: fastestmirror
Loading mirror speeds from cached hostfile
 * base: centos.mirror.triple-it.nl
 * elrepo: ftp.nluug.nl
 * epel: ftp.nluug.nl
 * extras: centos.mirror.triple-it.nl
 * updates: centos.mirror.triple-it.nl
 * webtatic: uk.repo.webtatic.com
========================================================== N/S matched: php56w ==========================================================
php56w.x86_64 : PHP scripting language for creating dynamic web sites
php56w-bcmath.x86_64 : A module for PHP applications for using the bcmath library
php56w-cli.x86_64 : Command-line interface for PHP
php56w-common.x86_64 : Common files for PHP
php56w-fpm.x86_64 : PHP FastCGI Process Manager
php56w-gd.x86_64 : A module for PHP applications for using the gd graphics library
php56w-imap.x86_64 : A module for PHP applications that use IMAP
php56w-mbstring.x86_64 : A module for PHP applications which need multi-byte string handling
php56w-mcrypt.x86_64 : Standard PHP module provides mcrypt library support
php56w-mssql.x86_64 : MSSQL database module for PHP
php56w-mysql.x86_64 : A module for PHP applications that use MySQL databases
php56w-mysqlnd.x86_64 : A module for PHP applications that use MySQL databases
php56w-odbc.x86_64 : A module for PHP applications that use ODBC databases
php56w-opcache.x86_64 : An opcode cache Zend extension
php56w-pdo.x86_64 : A database access abstraction module for PHP applications
php56w-phpdbg.x86_64 : Interactive PHP debugger
php56w-process.x86_64 : Modules for PHP script using system process interfaces
php56w-pspell.x86_64 : A module for PHP applications for using pspell interfaces
php56w-recode.x86_64 : A module for PHP applications for using the recode library
php56w-snmp.x86_64 : A module for PHP applications that query SNMP-managed devices
php56w-soap.x86_64 : A module for PHP applications that use the SOAP protocol
php56w-tidy.x86_64 : Standard PHP module provides tidy library support
php56w-xml.x86_64 : A module for PHP applications which use XML
结果展示了我们能直接安装的所有PHP5.6相关包,输入对应的包名即可安装,比如:
yum install php56w-cli php56w-fpm php56w-mysql php56w-gd php56w-mbstring php56w-mcrypt php56w-opcache php56w-pdo php56w-xml
如果想要安装PHP5.5,则只需将php56w改成php55w即可,PHP 7.0和PHP 7.1一样的。
安装MariaDB
接下来是安装LNMP中的MySQL,由于CentOS7开始,MySQL在官方仓库被替换成了MariaDB,我们直接MariaDB:
yum install mariadb mariadb-server -y
安装完了所有组件之后,我们开始配置各个组件。
配置Nginx
通过源安装的Nginx,默认配置文件目录在/etc/nginx/,主配置文件是/etc/nginx/nginx.conf,我们就从这个文件开始配置。
这是nginx.conf默认内容:
user  nginx;
worker_processes  1;
error_log  /var/log/nginx/error.log warn;
pid        /var/run/nginx.pid;
events {
    worker_connections  1024;
}
http {
    include       /etc/nginx/mime.types;
    default_type  application/octet-stream;
    log_format  main  '$remote_addr - $remote_user [$time_local] "$request" '
                      '$status $body_bytes_sent "$http_referer" '
                      '"$http_user_agent" "$http_x_forwarded_for"';
    access_log  /var/log/nginx/access.log  main;
    sendfile        on;
    #tcp_nopush     on;
    keepalive_timeout  65;
    #gzip  on;
    include /etc/nginx/conf.d/*.conf;
}
我们需要更改一些内容。
添加一个用来专门运行web相关且不能登陆的用户www:
useradd www -s /sbin/nologin
将nginx的运行用户设置为我们刚添加的www,只需将上述内容中的user后面的nginx改成www就好了。
出于性能考虑,我们应该充分利用起服务器的多个核心(如果有的话),将worker_processes后面的数字改成对应CPU核心数。
再者,出于隐藏nginx版本号考虑,我们还需在http区域内添加一行配置,让nginx隐藏自身版本号:
server_tokens off;
最终的nginx.conf文件内容如下:
user  www;
worker_processes  1;
error_log  /var/log/nginx/error.log warn;
pid        /var/run/nginx.pid;
events {
    worker_connections  1024;
}
http {
    include       /etc/nginx/mime.types;
    default_type  application/octet-stream;
    log_format  main  '$remote_addr - $remote_user [$time_local] "$request" '
                      '$status $body_bytes_sent "$http_referer" '
                      '"$http_user_agent" "$http_x_forwarded_for"';
    access_log  /var/log/nginx/access.log  main;
    sendfile        on;
    #tcp_nopush     on;
    keepalive_timeout  65;
    gzip  on;
    include /etc/nginx/conf.d/*.conf;
    server_tokens  off;
}
配置PHP
因为我们是利用Nginx搭配PHP-FPM工作,所以,还需要对PHP及PHP-FPM进行相应配置。PHP相关配置文件都在/etc或者/etc/php*目录下,我们需要对这些文件进行修改。
首先更改/etc/php.ini,里面有一行cgi.fix_pathinfo=1,我们需要将其找到,并将其值改成0,大概在774行,找到,将其修改:
cgi.fix_pathinfo=0
隐藏PHP版本号:
expose_php = Off
修改PHP-FPM配置,配置PHP-FPM以nginx相同的用户运行:
vim /etc/php-fpm.d/www.conf
将这一段的apache改成www也就是我们刚刚添加的用户:
; Unix user/group of processes
; Note: The user is mandatory. If the group is not set, the default user's group
;       will be used.
; RPM: apache Choosed to be able to access some dir as httpd
user = www
; RPM: Keep a group allowed to write in log dir.
group = www
注意,这个配置文件中有一行,决定了PHP-FPM的监听方式:
listen = 127.0.0.1:9000
这一项配置涉及到后面Nginx的配置,PHP-FPM是监听端口还是以sockets方式运行这里不做讨论,有需求的自行Google,我这里用默认的端口形式。如果需要改成socket形式,注意路径及相应目录权限。
配置MariaDB
其实也就是MariaDB的初始化,以及相应配置文件的更改。
首先,启动MariaDB:
systemctl start mariadb
初始化、设置默认root密码、禁止远程连接、移除测试数据库都在这一个命令中完成:
mysql_secure_installation
回车之后,根据提示进行设置就好了,很简单,我这里不贴了。
然后,根据服务器的配置,选择一个合适的配置。MariaDB默认自带了几个配置文件,适合不同配置的服务器,以下命令可查找到:
[root@doams3 ~]# find / -name my-*.cnf
/usr/share/mysql/my-huge.cnf
/usr/share/mysql/my-innodb-heavy-4G.cnf
/usr/share/mysql/my-large.cnf
/usr/share/mysql/my-medium.cnf
/usr/share/mysql/my-small.cnf
我选择最后一个,small的,这配置适合我当前服务器,先备份当前默认MariaDB配置再用对应的配置文件覆盖默认的配置文件:
[root@doams3 ~]# cp /etc/my.cnf{,.bak}
[root@doams3 ~]# cp /usr/share/mysql/my-small.cnf /etc/my.cnf
cp: overwrite ‘/etc/my.cnf’? y
修改完之后,重启MariaDB生效,如果有问题或者无法启动,可以还原默认配置文件。
添加网站
添加网站,我们只需要新增Nginx的配置文件即可。在/etc/nginx/conf.d/新增一个配置文件,比如说,起名test.conf :
vim /etc/nginx/conf.d/test.conf
server {
    listen       80;
    server_name test.cloudbool.com;
    location / {
        root   /var/www/test;
        index index.php index.html index.htm;
    }
    error_page  404              /404.html;
    location = /404.html {
        root   /usr/share/nginx/html;
    }
    error_page   500 502 503 504  /50x.html;
    location = /50x.html {
        root   /usr/share/nginx/html;
    }
    location ~ \.php$ {
        root           /var/www/test;
        fastcgi_pass   127.0.0.1:9000;
        fastcgi_index  index.php;
        fastcgi_param  SCRIPT_FILENAME   $document_root$fastcgi_script_name;
        include        fastcgi_params;
    }
}
新建PHP测试文件:
vim /var/www/test/test.php
<?php
phpinfo();
?>
这里,我配置域名为test.cloudbool.com,默认网站目录在/var/www/test,如果没有,新建对应的目录即可,然后给予相应的权限,注意这一步非常重要,如果不给予权限,可能后面访问会报错:
chown -R www:www /var/www/test
然后,测试Nginx的配置文件是否正确:
[root@doams3 ~]# nginx -t
nginx: the configuration file /etc/nginx/nginx.conf syntax is ok
nginx: configuration file /etc/nginx/nginx.conf test is successful
如果像上述输出了successful字样,则说明nginx配置无问题。
重启Nginx、PHP-FPM、MariaDB,查看效果:
systemctl restart nginx
systemctl restart php-fpm
systemctl restart mariadb
然后,打开上述在nginx配置的域名,查看效果:
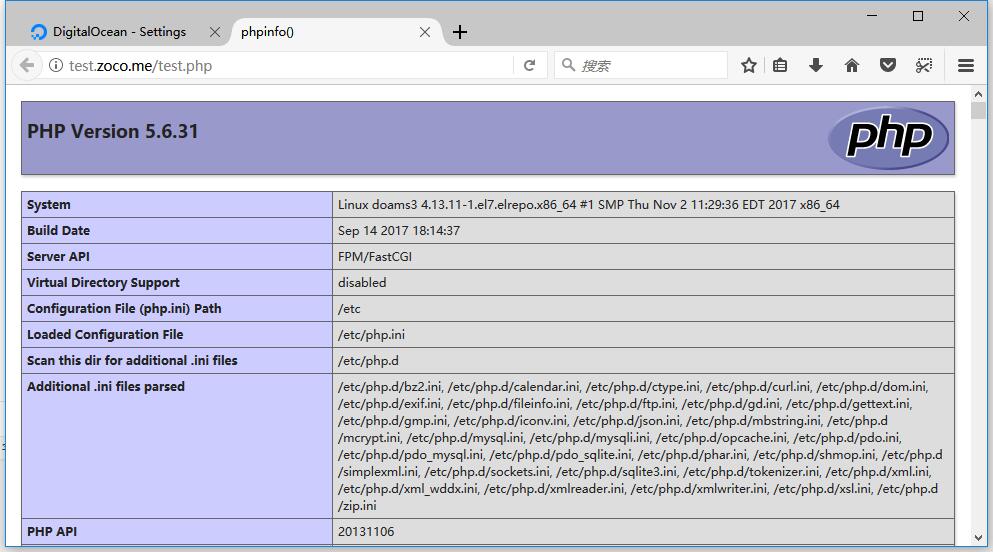
如果页面空白或者报错或者提示***No input file specified. ***,则可能是SELinux没配置好或者防火墙没有放行,临时关闭SELinux:
setenforce 0
防火墙放行80端口及443端口:
firewall-cmd –permanent –add-port=80/tcp
firewall-cmd –permanent –add-port=443/tcp
firewall-cmd –reload
或者临时关闭防火墙:
systemctl stop firewalld
结尾
开机启动Nginx、PHP-FPM、MariaDB:
systemctl enable nginx
systemctl enable php-fpm
systemctl enable mariadb
启用HTTPS,并强制HTTP跳到HTTPS进行SSL举例配置:
server {
    server_name www.cloudbool.com cloudbool.com;
    listen   443 ssl http2 default;
    ssl_protocols TLSv1.2 TLSv1.1 TLSv1;
    ssl_certificate     /var/www/zoco-ecc.crt;
    ssl_certificate_key /var/www/zoco-ecc.key;
    root /var/www/zoco;
    index index.html index.php index.htm;
    location / {
        try_files $uri $uri/ /index.php?$args;
    }
    access_log /var/log/nginx/zoco.log;
    error_log /var/log/nginx/error.zoco.log;
    error_page 404 /404.html;
    error_page 500 502 503 504 /50x.html;
    location = /50x.html {
        root /usr/share/nginx/html;
    }
    location ~ \.php$ {
        try_files $uri /index.php =404;
        fastcgi_split_path_info ^(.+\.php)(/.+)$;
        fastcgi_pass unix:/run/php-fpm/php71-fpm.sock;
        fastcgi_index index.php;
        fastcgi_param SCRIPT_FILENAME $document_root$fastcgi_script_name;
        include fastcgi_params;
    }
}
server {
    listen 80;
    server_name cloudbool.com www.cloudbool.com;
    location / {
        rewrite ^/(.*)$ https://cloudbool.com/archive/$1 permanent;
    }
}